Equipment Down? Use This Universal Repair Checklist Before You Pay for Service
Equipment Down? Use This Universal Repair Checklist Before You Pay for Service
Equipment never seems to fail at a convenient time. Whether it is a key component on a production line or a precision device in an office, every minute of downtime turns into real money lost. Before you call an expensive service provider, it is often worth running a disciplined first-pass inspection. This universal four-step troubleshooting checklist is adapted from practical field habits used by experienced repair engineers.
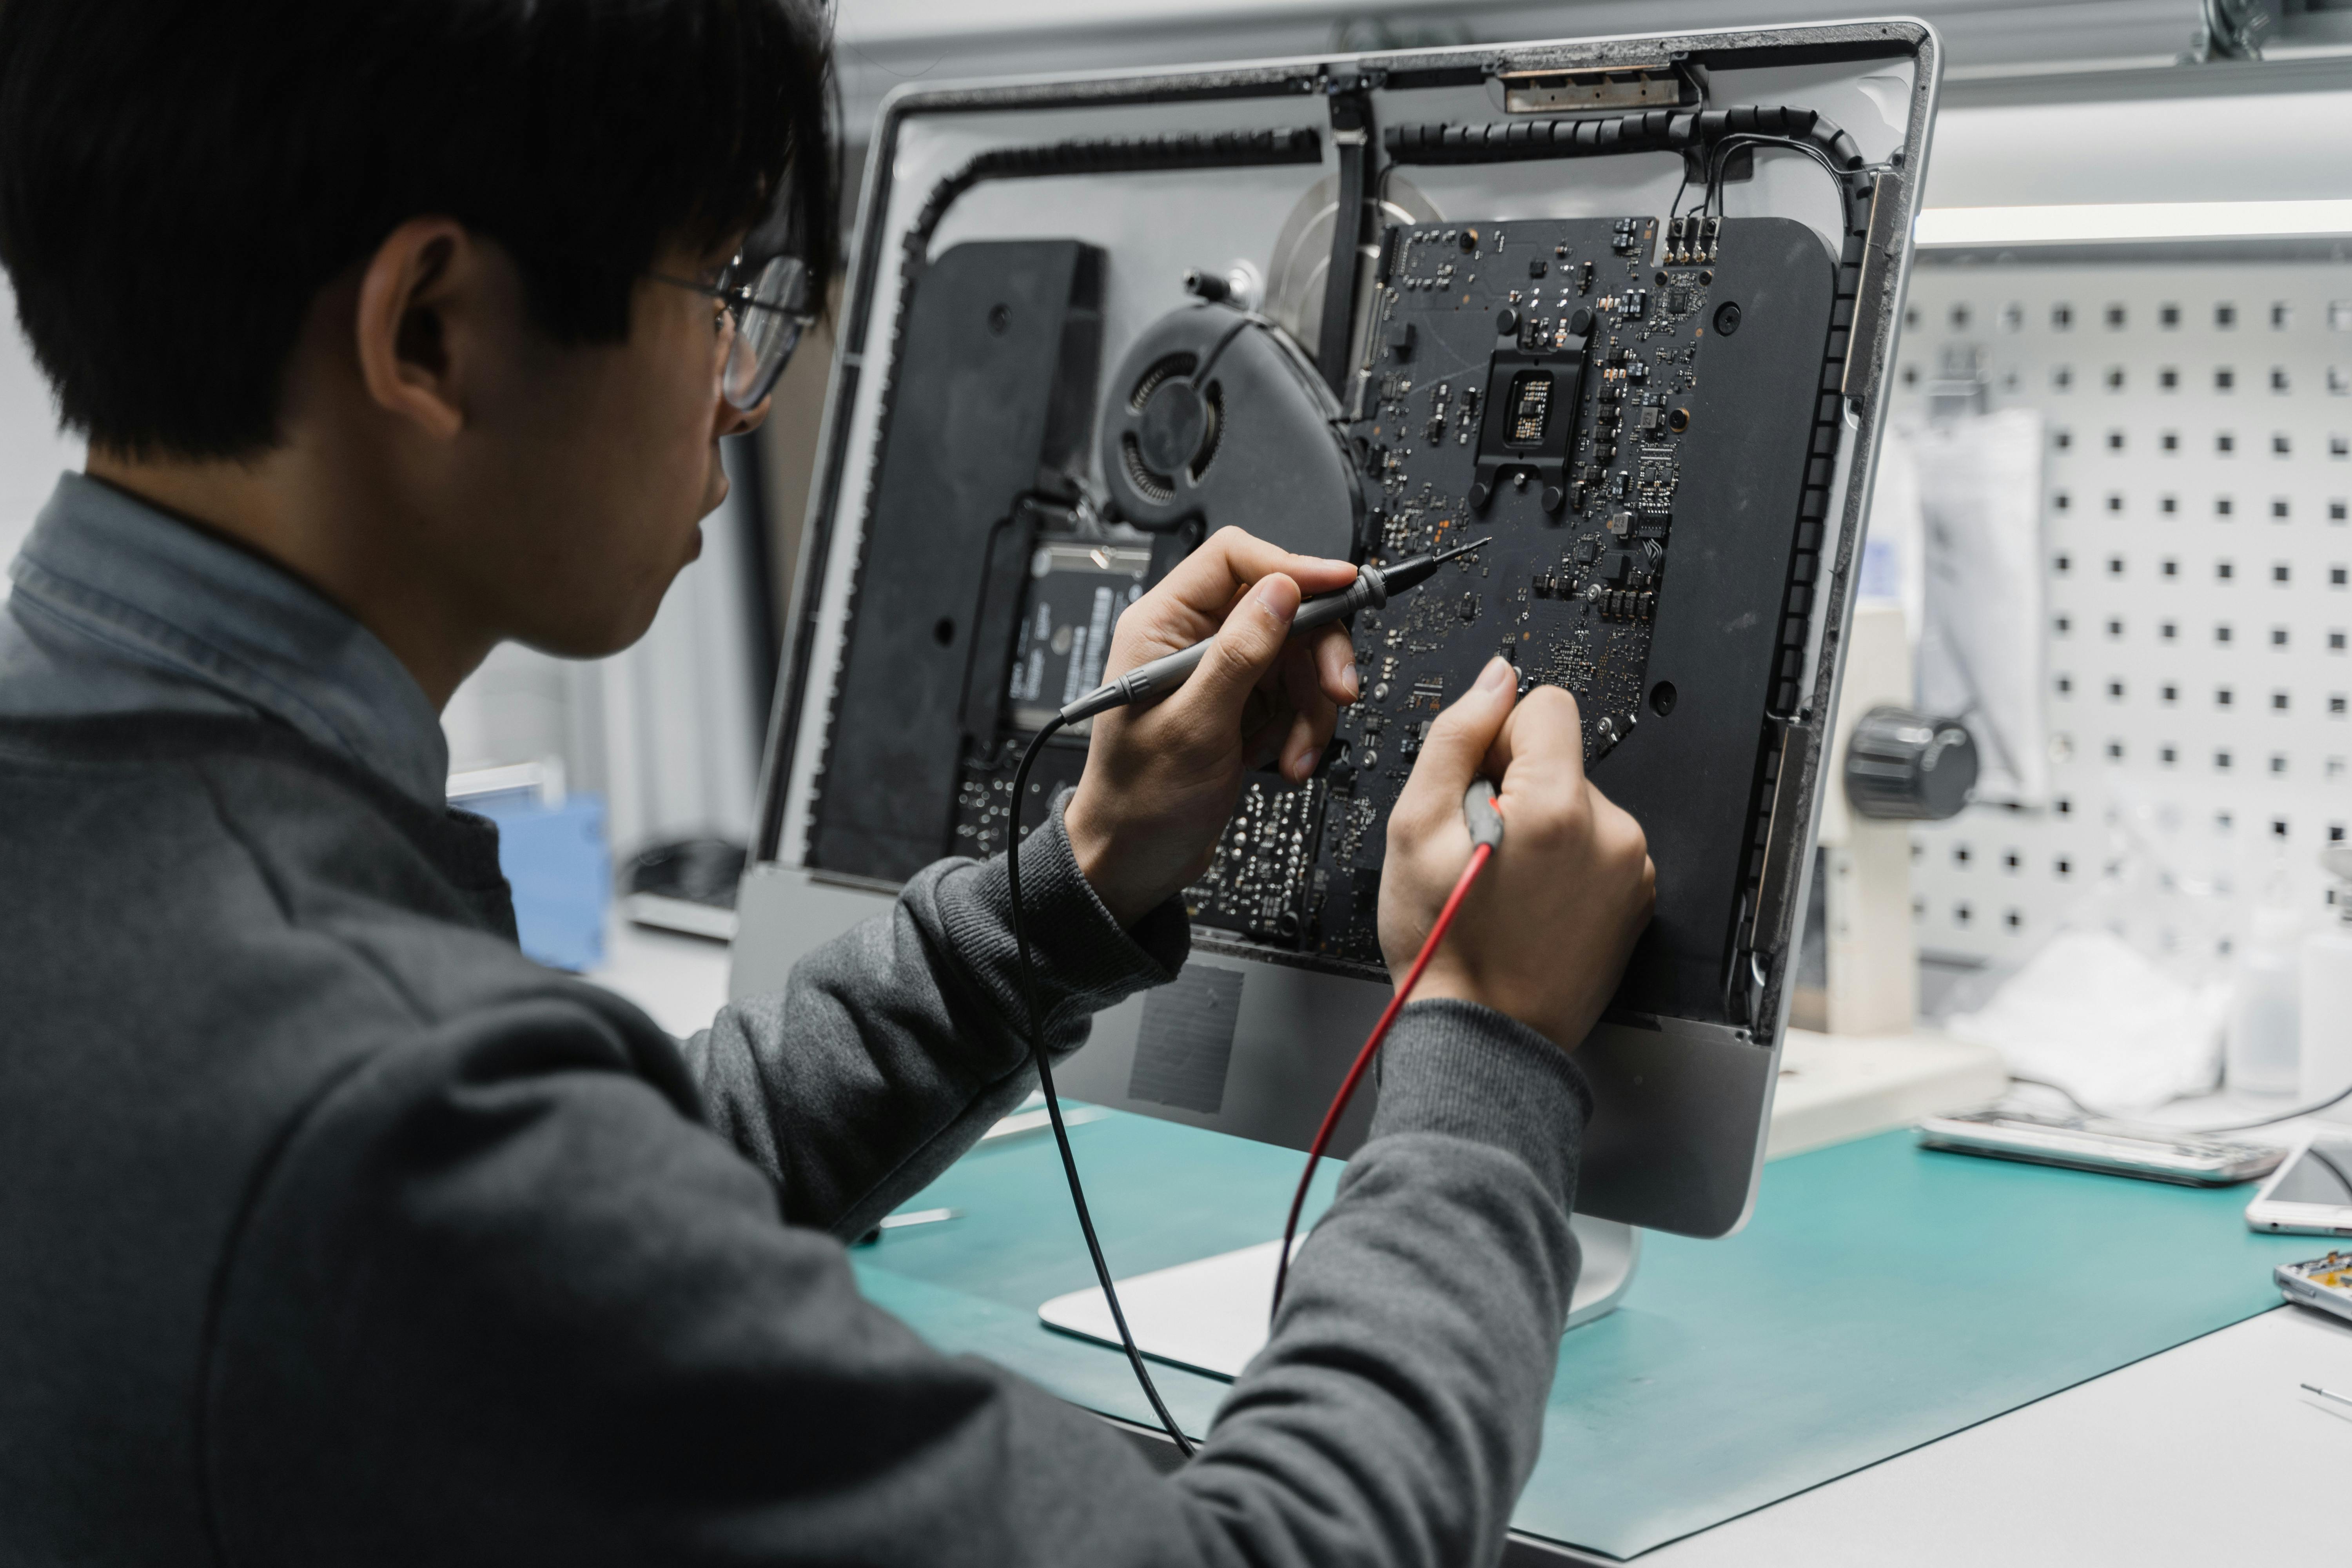
1. Start at the Scene: Deep Visual Inspection
Many faults are visible before any advanced testing begins. With power safely disconnected, inspect the equipment carefully.
- Connections: Check whether cables are loose, plugs are partially inserted, or terminals show burn marks.
- Components: Look for bulging capacitors, discoloration on boards, or unusual odors that suggest overheating.
- Environment: Check whether cooling vents are blocked by dust and whether moisture or condensation has entered the unit.
A careful visual inspection often saves hours of unnecessary disassembly.
2. Diagnose Logically: From Simple to Complex
One of the worst repair habits is tearing into a machine without first isolating the problem. Follow a clean troubleshooting path instead.
- Power first: Check the fuse, breaker, and basic power path. Sometimes the entire failure is a simple trip event.
- Input versus output: If the input signal is normal but output is missing, the fault is likely inside the device. If the input is already wrong, the upstream system deserves attention first.
- Error codes: Read the service manual and decode any fault messages. Error codes are often the machines most direct confession.
3. Build a Core Tool Kit
Basic troubleshooting becomes far more efficient when the right tools are always within reach. A practical starter kit should include:
- Multimeter: For voltage, resistance, and continuity checks.
- Anti-static wrist strap: To protect sensitive electronic parts when touching boards or modules.
- Infrared thermal imager: To locate abnormal heat patterns and potential short points quickly.
- Isopropyl alcohol (IPA): To remove oxidation, dust residue, and surface contamination from contacts.
4. Prevention Beats Repair
The highest level of maintenance is preventing failures before they stop the machine. Three habits matter more than people think:
- Build an inspection checklist: Spend five minutes each day checking critical indicators.
- Remove dust regularly: Dust is one of the most common enemies of electronics and cooling systems.
- Keep a repair log: Every repair record becomes part of a future fault database.
Engineers Note
If the problem reaches board-level microchip replacement and you do not have proper soldering tools or experience, stop there. Knowing when to continue and when to hand the job to a specialist is also part of professional maintenance judgment.
A calm inspection process, a logical diagnostic path, and a few reliable tools can prevent many unnecessary service bills. In many cases, the most valuable repair skill is not speed, but disciplined observation.
Related Articles
Why Console Navigation That Gets Worse With Use Often Exposes Panel-Control Weakness Earlier Than A Hard Failure
If navigation gets less crisp as the session goes on, the panel-control path may already be weakening while the machine is still broadly usable.
키보드 클러스터의 오작동이 보통 다섯 개의 불량 키가 아닌 공유 입력 경로를 가리키는 이유
동일한 키보드 클러스터가 함께 불안정해질 때, 여러 개의 개별 버튼 고장보다는 공유 콘솔 경로가 더 유력한 용의자입니다.
